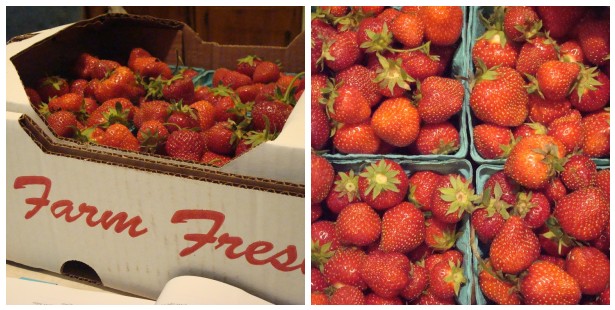
Glorious, Aren't They?
Two weeks ago, I drove out to Penns Valley to pick up 15 quarts of fresh-picked strawberries. The Amish family from whom I purchased them was busily plucking these delicious wonders from their mother plants as I drove down the gravel lane to the farm house. Warmed by the sun and still gritty from their natural habitat, these babies were delectably perfect! The first real fruits of the season, I marveled at them, and I marveled at the young Amish boy who told me with a deadpan face that they had planted 3,000 plants that year - 500 each of six different varieties, making for a product that was unique throughout the valley. I could hardly wait to get them home to make jam!
My mom and I have made jam together many times before, but always the fairly simple, but wonderfully delicious, freezer variety. This year, I was determined to apply my newfound canning skills and make homemade canned jam on the stove top. The process was much more involved, and took about 3 hours, but went (mostly) without a hitch, and resulted in a delicious product. Last summer, I did a lot of canning, but was so hurried about it that I really didn't do much documentation of the process, something I hope to change this summer, beginning now....
To make this jam, I used the recipe in the Ball Blue Book of Preserving. I use that book for most of my canning- Ball just knows what they're doing!
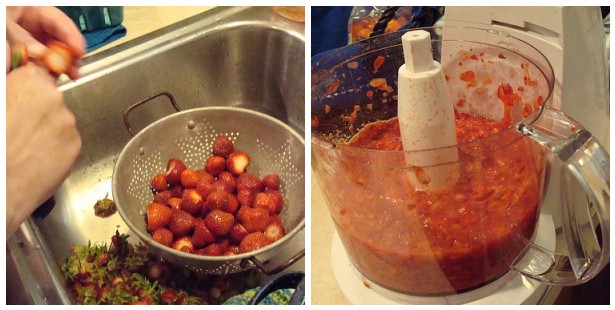
The first step in the canning process is to carefully clean and top the strawberries, and then crush them (I use a food processor and pulse 2-3 times, careful to avoid a puree).
Pour the crushed strawberries into a pot, adding about 6 cups of sugar to 2 quarts of strawberries (nobody said this was a calorie-free endeavor!!), and then stir the mixture together:
 (While caveats are usually reserved for the end of a post, I will put mine here, as this is where a critical decision occurred...Had I read the Ball Blue Book in any sort of detail, I would have picked up on the suggestion that one NOT multiply a jam recipe. I did not pick up on this. What follows this point took me about 3 hours to accomplish, when it should have taken, oh, I don't know, maybe 30 minutes?? - Next year will tell. End caveat.)
Bring the mixture up to boiling, and then you let it cook, stirring often to prevent sticking. You will eventually start to see the natural pectin in the strawberries at work, as the little gelatinous lumps you see in a jar of jam will begin to form. Note: One must be careful during the cooking process, especially the boiling part, as the mixture will foam, and could easily become Mt. Vesuvius, particularly if you've done as I did and broken the non-multiplication rules of the recipe:
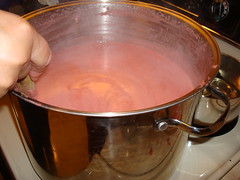
The "high water" lines in the pot tell all. We nearly had an eruption! Notice the foaminess.
My mom and I have made jam together many times before, but always the fairly simple, but wonderfully delicious, freezer variety. This year, I was determined to apply my newfound canning skills and make homemade canned jam on the stove top. The process was much more involved, and took about 3 hours, but went (mostly) without a hitch, and resulted in a delicious product. Last summer, I did a lot of canning, but was so hurried about it that I really didn't do much documentation of the process, something I hope to change this summer, beginning now....
To make this jam, I used the recipe in the Ball Blue Book of Preserving. I use that book for most of my canning- Ball just knows what they're doing!
The first step in the canning process is to carefully clean and top the strawberries, and then crush them (I use a food processor and pulse 2-3 times, careful to avoid a puree).
Pour the crushed strawberries into a pot, adding about 6 cups of sugar to 2 quarts of strawberries (nobody said this was a calorie-free endeavor!!), and then stir the mixture together:
(While caveats are usually reserved for the end of a post, I will put mine here, as this is where a critical decision occurred...Had I read the Ball Blue Book in any sort of detail, I would have picked up on the suggestion that one NOT multiply a jam recipe. I did not pick up on this. What follows this point took me about 3 hours to accomplish, when it should have taken, oh, I don't know, maybe 30 minutes?? - Next year will tell. End caveat.)Bring the mixture up to boiling, and then you let it cook, stirring often to prevent sticking. You will eventually start to see the natural pectin in the strawberries at work, as the little gelatinous lumps you see in a jar of jam will begin to form. Note: One must be careful during the cooking process, especially the boiling part, as the mixture will foam, and could easily become Mt. Vesuvius, particularly if you've done as I did and broken the non-multiplication rules of the recipe:
The "high water" lines in the pot tell all. We nearly had an eruption! Notice the foaminess.
Once things have gotten cooking, and you think it's starting to form actual jam, there are (supposedly) a few ways to test readiness. The first is by a simple temperature check. What you do here, is determine first the boiling point of the strawberries, and then add 8 degrees. Once it's there, it's done. I really wish I had read this before I started. I'd already gotten well beyond the boiling point when I found these guidelines on a hidden page in the Blue Book. (a general pointer about the Blue Book is that this happens all of the time. It's chock full of tips and tricks that are not on the same page as the recipes...you'd do well just to read the whole thing - or at least the pertinent section - before launching into actual doing, but where's the fun in that??!!)
Anyhooo....the second thing you can do is test with a spoon - it's called the sheeting test, I believe. If you take the spoonful of jam away from the heat and it drips off, it's definitely not ready. If it plops off in bigger blobs, it's getting there. If it comes off in a lovely "sheet", well then it's good to go. This test didn't seem to do it for me either, btw.
Finally, you can put some jam on a plate, put the plate in the freezer until it gets to be "room temperature," and then see whether it's "set up." I found this method to be the best, though still not quite perfect. (Don't you wish I'd thought to photograph this long part of the process?)
In the end, we decided to add just one packet of liquid pectin to the mix to ensure gelling, and called it done. The thing about hot jam is that it's, well, liquid. One can never really know the outcome until it's been poured into jars, canned, and then cooled for hours on end. The whole process reminded me that a lot of canning relies on faith - faith that things will taste good, faith that the jars will seal, faith that it will set up correctly when it cools, etc.
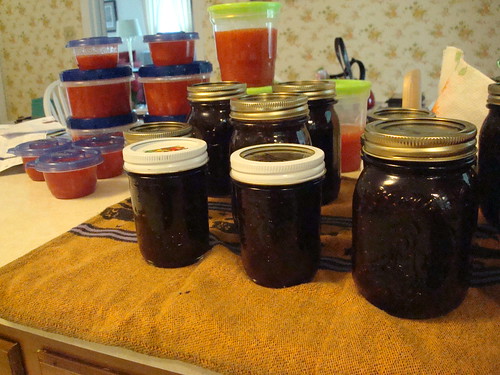
At long last, we were ready for canning. This part is fairly easy. Simply ladle the hot jam into hot jars, carefully place the lids on, and then boiling water bath process for 15 minutes. Photos of that sticky process follow....When all was said and done, my eight quarts of strawberries and 24 cups of sugar (yowza!) yielded 11.5 pints of jam, which I will ration very carefully through the year! The one sad thing about strawberry season is that it is horribly short, so that batch will likely be the first and last for the year.

Sticky Business!
Anyhooo....the second thing you can do is test with a spoon - it's called the sheeting test, I believe. If you take the spoonful of jam away from the heat and it drips off, it's definitely not ready. If it plops off in bigger blobs, it's getting there. If it comes off in a lovely "sheet", well then it's good to go. This test didn't seem to do it for me either, btw.
Finally, you can put some jam on a plate, put the plate in the freezer until it gets to be "room temperature," and then see whether it's "set up." I found this method to be the best, though still not quite perfect. (Don't you wish I'd thought to photograph this long part of the process?)
In the end, we decided to add just one packet of liquid pectin to the mix to ensure gelling, and called it done. The thing about hot jam is that it's, well, liquid. One can never really know the outcome until it's been poured into jars, canned, and then cooled for hours on end. The whole process reminded me that a lot of canning relies on faith - faith that things will taste good, faith that the jars will seal, faith that it will set up correctly when it cools, etc.
At long last, we were ready for canning. This part is fairly easy. Simply ladle the hot jam into hot jars, carefully place the lids on, and then boiling water bath process for 15 minutes. Photos of that sticky process follow....When all was said and done, my eight quarts of strawberries and 24 cups of sugar (yowza!) yielded 11.5 pints of jam, which I will ration very carefully through the year! The one sad thing about strawberry season is that it is horribly short, so that batch will likely be the first and last for the year.
Sticky Business!
Finally, notice the difference in color between Mom's freezer jam (uncooked) and the canned jam (cooked). I'm so excited to get to eat both this year! Each has a different flavor. The freezer variety bright, fresh, and sweet. The canned variety is like molasses, decadent in a different way.
Now I'm looking forward to zucchini season - can't wait to put some of this goodness on some homemade Z-bread!! (To Be Continued.....)
Now I'm looking forward to zucchini season - can't wait to put some of this goodness on some homemade Z-bread!! (To Be Continued.....)